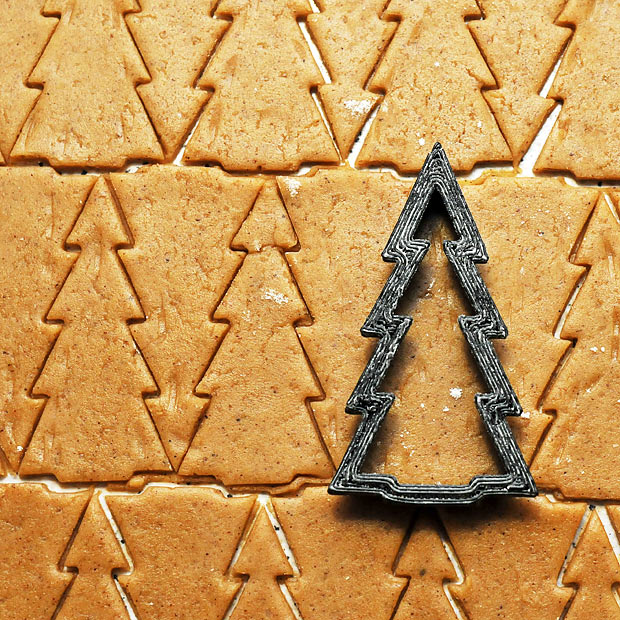
Some say 2012 was the year when 3D printing hit the mass market – and that happens to be the year when the cookie cutters shown were printed. The Christmas tree design I made using the program Tess. I also opted for the kite and dart shapes which are used for the classical Penrose tiling. As a follow-up to my post on cookie tessellations a friend helped me 3D print cookie cutters so I could make ginger bread cookies with a minimal waste of dough. The files needed for printing can be downloaded from Thingiverse. Given the recent findings on how cutlery, plates, music and color affect flavor perception, it came as no surprise that my tessellated gingerbread cookies had a somewhat more exquisite and distinct taste compared to “normal” gingerbread cookies!
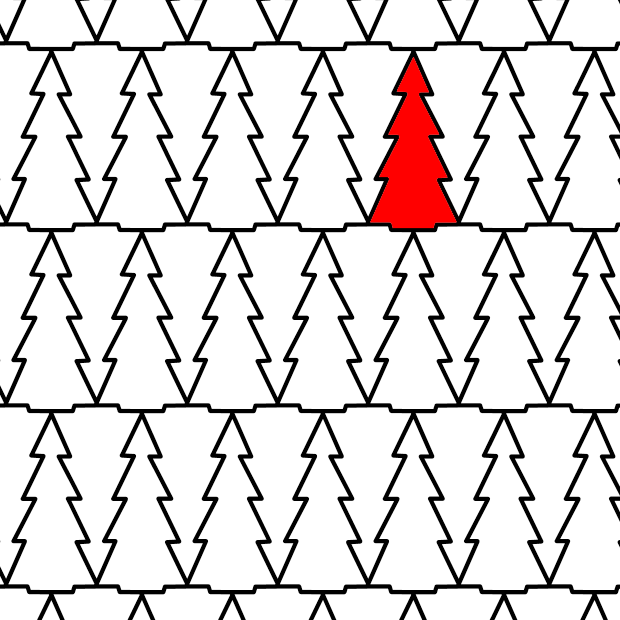
This is what the christmas tree design looked like out of the program Tess used to create the tessellations.
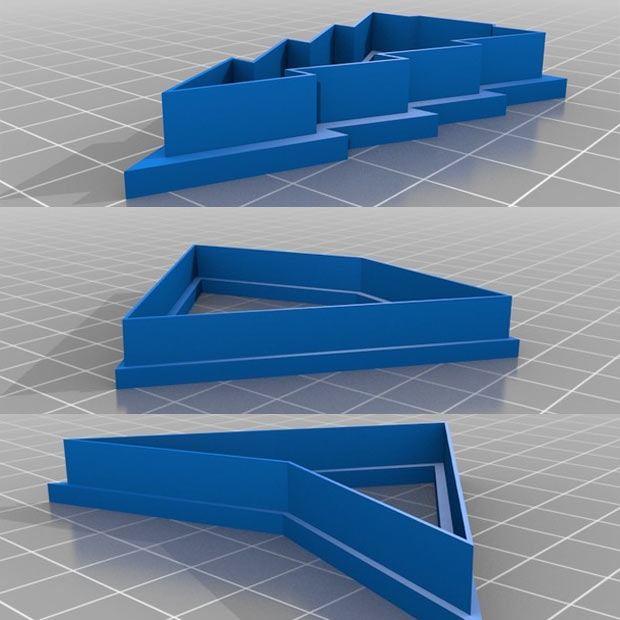
Files for 3D printing are available from Thingiverse.

Roll your dough to about 2 mm thickness and fill with your favorite holiday tessellation!

A random Penrose tiling – fascinating, but quite obvious from the pattern that I lack the training needed to avoid creating edges where the tessellation stops…
Further reading: Recreational kitchen mathematics: Cookie tessellations
Nice to see an entry on your blog again, looking forward to many new interesting articles in 2014!
Thanks!
how about sharing that cookie recipe, they look delicious, thank you for this wonderful website, best wishes for a happy and yummy holiday.
Ginger bread cookies
150 g butter
140 g syrup, dark
175 g sugar
100 g heavy cream
0.5 t cloves, ground
0.5 t ginger, ground
2 t cinnamon
1 t baking powder
ca. 450 g wheat flour (all purpose)
Gently heat butter, syrup and sugar until butter has melted. Remove from heat. Stir in heavy cream. Add spices, baking powder and most of the flour and work into the dough. Add rest of flour if necessary. When properly kneaded, leave to rest in fridge over night. Take approx 1/4 of the dough and roll out until about 2-3 mm thick. Use templates as desired. Bake at 175 °C for about 9-10 min (watch carefully so they don’t burn). Leave to cool. The dough becomes very sticky when warm, so work together leftovers (unless you use tesselating templates) and put them in the fridge to cool before you roll out again. Enjoy!
(recipe adapted from http://www.tine.no/oppskrifter/kaker/vafler-og-smakaker/julens-deiligste-pepperkaker)
Wrap that cutter pattern around a rolling pin! Also, graphics programs like Krita have a wrap-around function which lets you generate spatially-repeating patterns.
Yes – a rolling pin would be excellent! Will check out Krita – thanks for the tip.
Where can I purchase your awesome tree cookie cutter?
@Stepanie: Sorry – I don’t think they are for sale anywhere. You should try to have them 3D-printed. You’ll find links to the required files for this in the post. Note that there are also commercial 3D printers where could potentially order in your material of choice.