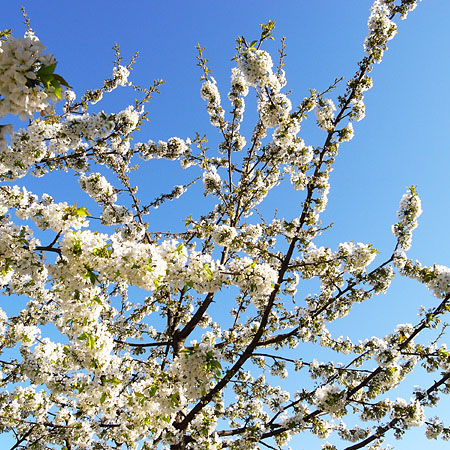
We have a small garden with a single tree. It’s a sweet cherry tree and this year must have been one of the best ever. In May it was overthrown with flowers. Last year I made some jam which came out OK, but the drawback with sweet cherries is that their taste doesn’t really compare with that of sour cherries. They’re good to eat, but not as good for cooking and jam as their sour cousins. The summer last year was quite wet and cold which could explain the fad taste, but this year however has been quite hot and the cherries grew darker and sweeter as summer proceeded.
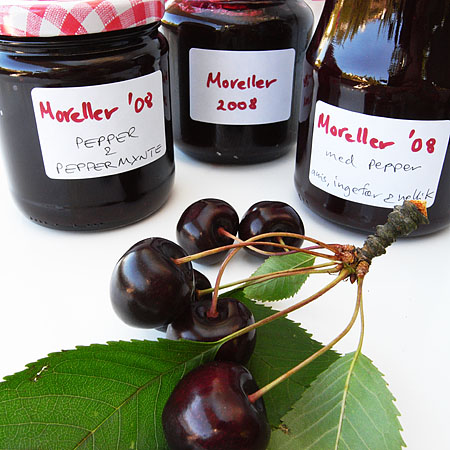
I decided to give cherry jam another try. To improve the flavor even further, I was pondering on adding spices. My mom has previously added cloves and cinnamon to plums when making jam. The first place I looked was under cherries in the book “Culinary artistry”. Among the numerous suggestions for flavor pairings it was black pepper and lemon that caught my attention. Who would have thought? I made a small test batch and was quite pleased by the “bite” provided by pepper so I proceeded with a full batch. I used a pre-mixed gelling sugar from Danisco sugar (which contained sugar, pectin, a preservative and an acid), but you could use whatever pectin you have at hand. Just follow the instructions on the pack (more on the science further down).
Having added pepper and a little of the sugar to get an idea of how it would turn out, it almost felt as if ginger was already there so I added a little more to accentuate that. The other spices were added to round everything off. The pepper taste is quite noticeable if you eat the jam by itself, but on buttered bread or toast it’s really nice. I also suggest that you try it with different semi-soft and hard cheeses such as Emmentaler, Jarlsberg, Prästost, Parmesan or Pecorino. My wife thinks it’s a little to much pepper, but for me it’s just perfect. In German this jam would be known as a Herrenmarmelade (a gentleman’s jam). If you’re not very fond of pepper however it’s a good idea to start with half the amount of pepper.
Spicy cherry jam with pepper
3.7 kg depitted sweet cherries
7.0 g black pepper, ground
0.8 g cloves, ground
0.7 g ginger, ground
1.3 g anis seeds, ground
0.8 g star anis, ground
zest and juice from 1/2 lemon
2.2 kg gelling sugar (with pectin and preservative)
Place enough jars in a cold oven and heat to 120-130 °C to sterilize them (this is more convenient than in boiling water). Depit cherries (conveniently done with a cherry stoner) and cut in four (helps you discover those stones that eluded the cherry stoner). Add spices and bring to boil. Remove any remaining pits that float up to the surface. Pureé with immersion blender (hopefully you will not hear the sound of cherry pits being crushed at this stage). Add gelling sugar. Let boil and skim of foam. Fill the hot jars immediately. And remember – as all chemists know – hot glass looks just like cold glass! Use a canning funnel to avoid spilling jam on the sealing surface of the jars. Leave to cool for 10-15 minutes and then screw on lids. I usually wipe the inside of the lids with 40-60% alcohol and then screw them on tightly before the alcohol has evaporated. There’s more at the end regarding the procedure for closing the jars.
This way of canning is very convenient and the jam will keep for several years in closed jars if kept in a cool, dark and dry place. This is due to the high sugar concentration (sugar binds water, and unless water is available, molds won’t grow), the low pH and – if added – the presence of preservatives. A more tedious way is to sterilize the jars after filling by boiling in water. This is no doubt the best way to sterilize the jars, but for jams with a high sugar content and a low pH it’s a little overkill. The National Center for Home Food Preservation in the US has more information about this (but notice that there are different traditions – I wonder if there is a divide between Europe and North America?). There are also many books about this and good place to start would be the “Ball Blue Book of Preserving”, better known as BBB among home canners. If you chose this method you should probably use a little more pectin as the additional heating at low pH will degrade some of the pectin making the jam more runny.
Using black pepper in a jam worked really well so I googled this and found Clotilde’s recipe for a strawberry jam with pepper and peppermint. She got it from Christine Ferber, author of “Mes confitures: The Jams and Jellies of Christine Ferber” which has recipes organized according to season. As mint was also mentioned as a good flavor pairing for cherries in “Culinary artistry” I thought I’d give pepper and peppermint a try.
Cherry jam with pepper and peppermint
2.2 kg depitted sweet cherries
1.3 kg sugar
2.4 g fresh peppermint leaves
2.8 g black pepper, ground
zest and juice of 1/2 lemon
1 pack of Certo fruit pectin*
Depit cherries and cut in four. Add pepper and peppermint and bring to boil. Remove any remaining pits that float up to the surface. Pureé with immersion blender. Add pectin and stir until dissolved. Add sugar. Let boil and skim off foam. Sterilize and fill jars as in the previous recipe.
[ * The Certo pack weighs 70 g and contains sugar (for easier dispersion of the pectin), citrus pectin, citric acid to get the right pH for gelling and a preservative (ascorbic acid). ]
This jam was dominated by peppermint and the pepper could barely be noticed. I found it very refreshing and there is a surprise element as the red color does not suggest the presence of peppermint. Apart from the obvious use as a bread spread, I can imagine that this jam would be very nice with roasted meat, especially lamb, reindeer, elk and perhaps also wild game.
Having experimented with different spices and peppermint, my wife asked me to also make a batch of plain cherry jam which I happily did. But next year I would like to try making cherry jam with red wine!
As you can imagine, I couldn’t do all this without offering the chemistry behind some thoughts. Pectin chemistry is quite complicated though and there are several types available (low methoxyl, high methoxyl and amidated – so far I’ve only included the two first in “Texture – A hydrocolloid recipe collection”). Commercial packs of pectin for home use do normally not specify which type of pectin they contain, but I assume that it is the high methoxyl which gels in the presence of sugar and at low pH (as opposed to the low methoxyl which requires calcium ions to gel). The easiest is probably to follow the instructions that come with the pack you chose. Always add pectin before you add sugar (unless you premix them). The reason for this is that the gelling of high methoxyl pectins is promoted by sugar. If you add sugar before pectin, it will be very diffult to get the pectin properly dispersed and dissolved (it can be done with an immersion blender though – I’ve tried that once). Ready to use pectin is often pre-mixed with an acid to get the pH below 3.5 which promotes gelling. Citric acid is often used, and plain lemon juice will also do the job. Lowering the pH is especially important when using ripe or over ripe fruit as these can be less acidic and also contain less pectin if we are talking about pectin containing fruit. After the pectin and sugar have been added, the jam shouldn’t boil for more than a couple of minutes as pectin is not very heat stable.
There are also a couple of claims found in jam recipes which I have been wondering about:
Skimming: Almost all recipes I have seen for jams call for rapid skimming of the foam which formes when the jam mixture boils. One explanation I’ve seen is that this is done to prevent growth of mold, as these apparently grow more easily in the foam. There are certainly airborn molds, but the bubbles in the foam come from the jam as it boils, so it’s been very hot and presumably sterilized. So I’m simply wondering if the whole skimming is about esthetics – which is is still a good enough reason to me (but then I wish the recipes could state that!).
Turning jars upside-down: One thing that has puzzled me for a time is why recipes recommend that the jars should be turned upside-down. I’ve googled and checked several books and have come up with a couple of explanations (but most recipes only state that it should or shouldn’t (!) be done, without giving any reason). The fun thing is that the suggested time for how long the jars should remain turned upside-down varies from 2 minutes to several hours when the jam is cool and has set.
- One site claims it is done to prevent larger pieces of fruit from settling to the bottom. This does make sense, and in that case there is no reason to do it if the fruit has been puréed.
- A blogpost commenter suggests that turning the jars upside-down for 5 minutes makes sure the inside of the lid gets sterilized too. The temperature of the jam at this time is probably somewhere around 95 °C, so it does seem reasonable that it might kill some molds residing on the lid. I’d give this a thumbs up. Any microbiologist who could confirm this?
- Personally I have speculated whether turning the jars upside-down would allow water (or jam to be precise) to be drawn into the seal by capillary action and that this helps to make a perfect seal, but several sites emphasize that this should not be done to prevent the seal from being broken (these sites assume that a canner has been used – i.e. sterilizing the filled jars with lids in boiling water for 5 to 10 min). I’m not sure, but I wonder if there is a difference here between screw caps and glass lids with rubber bands?
- A last reason to turn jars upside down would be to prevent the water evaporating from the hot jam to condensate on the lid. If the jars are left to cool upside-down for 10-15 minutes, but turned back before the jam sets this will prevent water to condense on the lid and drip back to the surface of the jam. This water could potentially mean better conditions for growth of molds. This theory is also supported by the suggestion found in old cookbooks where the jars are left to cool completely without lids to let the surface dry and form a skin, and then covered with a filter paper dipped in alcohol before tying them up with pergament paper and string.
The conclusion so far regarding turning the jars upside-down can be summed up as follows. You should chose of the three methods:
- Cover with lid immediately and turn upside-down until cool enough to handle (~40-50 °C). Then return to upright position. This will prevent condensation of water on the lid, it might help create a better seal and it could possibly knock out some molds on the lid. The jam however will most likely not have set yet.
- As above, with the only difference that you leave the jars upside-down until cool and set. This means that the air pocket will not be below the lid but at the bottom of the glass when turned back to the upright position.
- Allow the jam too cool without lids until a skin has formed and the jars are cool enough to handle. This prevents condensation of water on the lid. Wipe the inside of the lids with the highest percentage alcohol available (but do NOT use denatured alcohol!) – typically it would be 40% or 60% – and screw on the lid before the alcohol evaporates. The skin formed will be less suceptible to growth of mold because there is less water present and because of the presence of alcohol.

I didn’t know the pepper and fruit combo was so popular. The first time I”d heard of it was when Eating Well magazine did a Strawberry Pepper tart a couple summers ago.
The idea of heating the jars in the oven instead of boiling water is also quite appealing.
Yay! Interesting…
Lots of interesting stuff here, Martin. In fact, interesting enough so that I wrote a post on this myself. A couple of comments follow:
1) “Place enough jars in a cold oven and heat to 120-130 °C to sterilize them”:
Is this to avoid the glasses cracking? Are you certain that this is necessary with today’s glass quality? Also: don’t forget to do the same with the lids. Sterile jars won’t help if the lids are infected. The ethanol surely does help, but you can save some ethanol by heating them. I often use those jars with aluminium lids that pop up when you open them the first time (that is: I reuse jars from jam I’ve bought). If the lid draws/pops in when the jam cools and stays so, the vacuum is sufficient. Else, eat the jam right away (surely not a bad suggetion 🙂
2) “Leave to cool for 10-15 minutes and then screw on lids”:
Why? Leaving them open will result in (contaminated) air flowing into the jar. Closing immediately would certainly avoid this.
3) Foam:
I guess you’re right as long as the sterilisation is done properly. However, there are probably a large number of culinary presitions going around here as this is an old art (science?), and if one lets the jam cool before closing the lid, the foam will cool even more rapidly and contaminated air entering from the surroundings might infect the foam. The old rule of turning the jars upside down might help this because the hot jam will sterilise the lid and upper parts of the jar (see below). Also, foam might funtion as an insulating lid, both during cooking and storage, whatever effect that might have.
4) Turning the jar upside down:
Why not just store the jar upside down to be sure? I’m not a microbilologist, but after a chat with a biologist friend, we place our bets on alternative 2. Alternative 3 is also tempting, since a more viscous solution should leave the jars less prone to drawing in air, either due to dried and cracked seals (why are wine/champagne bottles stored lying on the side?) or because air/airborne microorganisms diffuse(s) more rapidly through air than a viscous jam. However, the moist atmosphere might be good enough for keeping the seals in good shape anyway (biologist comment: atmosphere above jam will funtion as a “moisture chamber”).
1) Yes, it’s to avoid cracking of the glas. It might be that the glass will survive being put directly into a hot oven as heat transfer is slower than in water, but I haven’t checked. Anyway you would have to check it before you actually start making the jam… It wouldn’t be nice to have 4 liters of boiling hot jam and a bunch of broken glass to take care of 😉 I do not put the lids in the oven because the plastic seal probably does not survive 120-130 °C. I believe boiling the lids and followed by a wipe of ethanol immediately before use is sufficient.
Regarding the sterilization of jars using dry heat at 120-130 °C I’ve been asked about how long they should stay in the oven. This is a difficult question, for a true sterilization (which can not be achieved with boiling water alone!) you would need pressurized steam for at least 15 minutes at 121 °C (also known as autoclaving). This corresponds to as much as 2 hours at 160 °C or 1 hour at 170 °C when dry heat is used. However, the idea is only to obtain the same degree of “sterilization” that boiling in water for 10-15 minutes would give. My guess would be that if you leave the jars for 1 hour at 120-130 °C it should be fine. And you could of course also turn up the temperature even more, but from practical experience, this doesn’t seem to help since the jars are not the weakest part of the chain (the lids, the filling procedure and the closing of the jars is).
2) This would be to allow a skin to form and to avoid condensation. Less water activity = less mold growth. If you close the jar immediately you have to turn it upside down. But if one for some reason (esthetics?) would like to keep the lid and the surface of the jam “clean”, you should wait a while before closing the jars.
4) Closing the jar immediately + turning upside down will be best to avoid growth of mold (unless you opt to sterilize the whole jar in boiling water using a home canner or simply a large pot with boiling water). I have tried this, but the main drawback is that it really doesn’t look very nice… It probably works better for jelly than for jam.
Alt. 3 (letting a skin form before closing) works fine as long as you wet the lid with alcohol. And if sugar contents is > 50% this will also slow down growth of molds considerably.
As a longtime canner, I agree with you on the upside-down theories 2 and 4–mainly 2. I’ve always done it for only five minutes and then righted them.
Of course, I always poured boiling-hot jam into scalded jars (you have to boil water for the lids anyway, right?), clapped the [metal] lids on immediately and inverted them. (I don’t do the boiling water bath and I’m still alive twenty years later….I also simply scald out my jars while they’re sitting on the counter and then cover them with a clean towel. Uses much less water than immersing and boiling them.)
FWIW, I’ve never had a failed seal and never had a spoiled/moldy jar, no matter how many years I kept it.
I oven heat the jars, high heat to strilise and allow them to cool to a sensible temperature so the jam doesn’t boil as it is put in. Why you can’t lid them straight away- if you do the contraction can create enough vacuum to crack the jars. Then you get a horrible mess and no jam!
Can somebody give me a ground-up description of the reaction that produces the jel in jelly? I am intrigued – two consecutive days, same apples, and two completely different jellies – one dark coppery colour as set slow but clear, one pale yellow gold and produced idiotic amounts of foam and trying to set in the pan even before I could get it in the jars. What did I do?
Can somebody please give me the reaction in equation form, so I understand this a little better?
Adeline,
have you ever experience jars cracking from the vacuum? I’d be surprised if that could actually happen… But I could imagine a jar cracking if you will piping hot jam into a cold jar.
Regarding the apples: Different amounts of sugar? (sugar influences gelling) Different volumes? (the one batch was perhaps heated longer than the other) Did you add anything but apples, sugar and water – for instance something that could have changed pH? (pectin jelling is to some extent sensitive to pH)
I read this too late and already have condensation in one of my jars of apple jelly (I used a le parfait jar with a glass lid) I assume from all of your comments that I will need to eat it as soon as possible and store it in the fridge?
Well I use bits and pieces of your methods. I sterilize jars by placing them open side down in a pan of very hot water in the oven set to 250 F. (The pan is pre-sterilized with alchohol, and I use bottled distilled water). I keep the two piece metal sealing lids in simmering water in a pot on the stove. I pour near boiling jam through an alcholhol sterilised metal funnel into the hot jars, place the hot lids and rings on immeadiately and call it good. No tipping/turning over, no processing.
I do this for a few reasons: 1. I have ‘hard’ mineralized water from my tap, so it leaves a mineral ‘film’ on glass. 2. I have a large family of small children, so jam making is nearly industrial – I make two quarts per batch and a minimum of 25 batches per year. I do use quart jars for jam, the large volume of boiling, sugared fuit filled within a quarter inch of the top has always turned out very well for me.
I quite clearly remember the practice of sealing with paraffin wax, to keep out moisture, and have considered trying it, nut don’t know enough about it to feel safe.
Bobbi: Why bother with a water filled pan for sterilization of (empty) jars? Isn’t it easier just to bump the temperature up to > 270 F and place the dry jars on a rack in the oven? Regarding wax – aren’t the screw lids nowadays sufficiently tight? Personally I think so.